How-to
How to Sharpen Wood Lathe Tools: The Professional Guide
Your lathe tools seem to become kind of dull recently. You really want to fix them but don’t know how? No need to worry since in this article, you can learn how to sharpen wood lathe tools on your own. With the right stuff and proper techniques, you can do this quickly and efficiently.
Introduction
To woodworking and pen turning enthusiasts, a lathe is undoubtedly among the most popular machine to use in their works. However, after a certain period of time, the lathe tool started to become dull which lead to undesirable results. Therefore, knowing how to sharpen wood lathe tools is essential in order to restore their effectiveness.
A well – sharpened lathe tool allows you to create products with less opportunity for cracks and dents to form. This means you can reach perfection with your product relatively easy and that is why the tool sharpness is very important. The entire sharpening process is also simple, just gather a few items from your toolbox and common material.
List of necessary tools and gears you need to have
- The lathe tool that needs to be sharpened
- One sharpening jig: Will be elaborated below
- Protective gears: To protect your eyes and hands while sharpening the lathe tool, goggles and gloves are mandatory. There will be a lot of dust and heat so make sure you have them on at all time.
- Sandpaper: To process the lathe tool after you finished sharpening.
The construction of the sharpening jig
The jig
To put it short, the sharpening jig main purpose is to steady the lathe tool while the sharpening takes place. You don’t need to have a pretty one, just make sure that it can do its job. There are also commercial models out there but if you can, try to make one to cut down the expense
With the sharpening jig, the sharpening process can proceed at a steady rate that guarantees a satisfactory result. All you have to do is grab some pieces of pinewood, create several 45 degrees angles then glue everything together. It probably takes one or two hours but you will get a useful tool to assist you for years.
The bracket
After you have finished gluing the jig, cut out another piece of wood in a U – shape frame. This will be the bracket for you to slide in the base of the jig so make sure its gap is suitable. After you got the bracket, place it down and punch in a butterfly screw on the top section.
When you complete both the jig and the bracket, push the jig base into the bracket. Slide the base in and out to see if there is any hindrance to the jig movements. If you feel everything is good, proceed to glue the bucket down on the table where you set the bench grinder.
Also consider putting a nut in the bracket backside under the screw so that you can bolt it down with ease. The jig base needs to be tightly secured by the screw before the sharpening process. The nut will keep the screw firmly in place while it’s being slowly bolted down to the jig base.
If the bracket is good and the sharpening jig is ready, time to start sharpening the lathe tool. As a reminder, make you have both the gloves and goggles on at this moment before proceeding. Clear out any obstacle on the ground around the bench, one moment of stumble and you lather tool will be useless.
The sharpening process
•Step 1: Position the lathe tool
Promptly slide the jig into the bracket and place the lathe tool against the jig 45-degree base. It’s vital that the lathe tool doesn’t have any space to wiggle or vibrate then the sharpening start. Adjust the lathe tool butt until you can minimize or eliminate the tool room for movement.
The next thing you need to focus on is the angle made by the lathe tip and the grindstone. The correct contact angle must not leave any noticeable gap or the product carving angle maybe ruined. It’s essential that you must achieve the precise angle before your turn on the bench grinder.
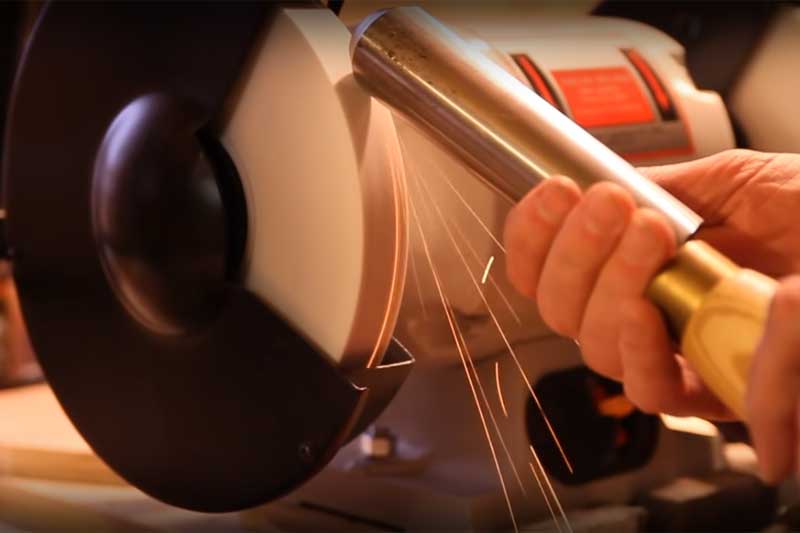
•Step 2: Lock in the jig and start sharpening
When both the lathe butt and tip are well positioned, bolt down the butterfly screw and get ready. The screw will steady the jig hence the lathe tool shall stay completely still in the entire process. Again, make sure that the goggles and the gloves are on before starting the bench grinder
You need to have a firm grip and apply an adequate amount of pressure but not too much. Just use enough force so the lathe tool doesn’t bounce or jump around. Hold the jig handle with your dominant hand while supporting the tool with the nondominant one.
Within a few moments, the tool will become very hot due to the grindstone friction. This is why a pair of gloves is necessary so you won’t burn your skin or shake your hand. For now, simply turn and rotate the lathe tool tip to your right.
Expect a lot of vibration in this part, you may feel kind of nervous if this is your first time. However, if you are really into woodworking and pen turning then it’s worth mastering this skill. Continue to move the lathe tool tip around the grindstone for 10 – 15 seconds.
•Step 3: Process the lathe tool and clean up
Finally, after you have done sharpening, the lathe tool shall have some burrs in its surface. Wait a couple minutes for the tool to cool down and take out your sandpaper. Slowly and carefully sand the lathe tool in the upward and away motion until you can’t feel any burrs.
Next, clean out the place and turn off the grinder. And remember to unscrew the bracket and remove the jig to store for future use. Instead of spending around 100$ for a commercial product, this handmade jig can do the same while saving you some money.
Conclusion
And that should cover pretty much all you should know about how to sharpen wood lathe tools. It’s is at heart a simple task which you can perform by yourself in the comfort of your house. If you got the right stuff and use the suitable techniques, the sharpening process will be just a walk in the park.